The steps below detail the simple process of creating an
image map in an .aspx page using SharePoint Designer 2010.
1) Edit your page in
SharePoint Designer
2) Insert an image to
which you would like to attach a hyperlink
3) Click on the image
to select it
4) Above the ribbon,
click on the Picture Tools (Format) tab
5) In the ribbon,
click on the Hotspot button
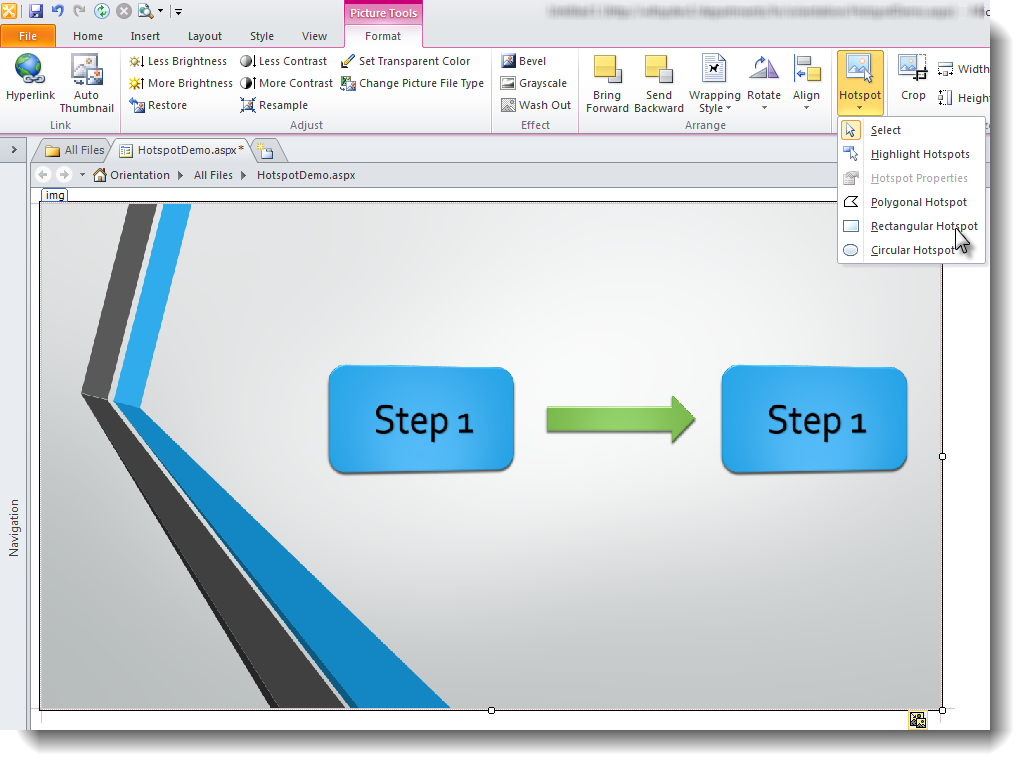
6) Select the type of
Hotspot that you would like to generate (Highlight, Polygonal, Rectangular,
Circular)
7) Drag your cursor
to highlight a portion of the image
8) When the Insert
Hyperlink dialogue appears, insert the target URL in the Address field

9) Click OK and save
your page
10) You are done!!! Test your page in a browser.
Note:
Hotspots are not available publishing pages


- Follow Me on Twitter!
- RSS
Contact